
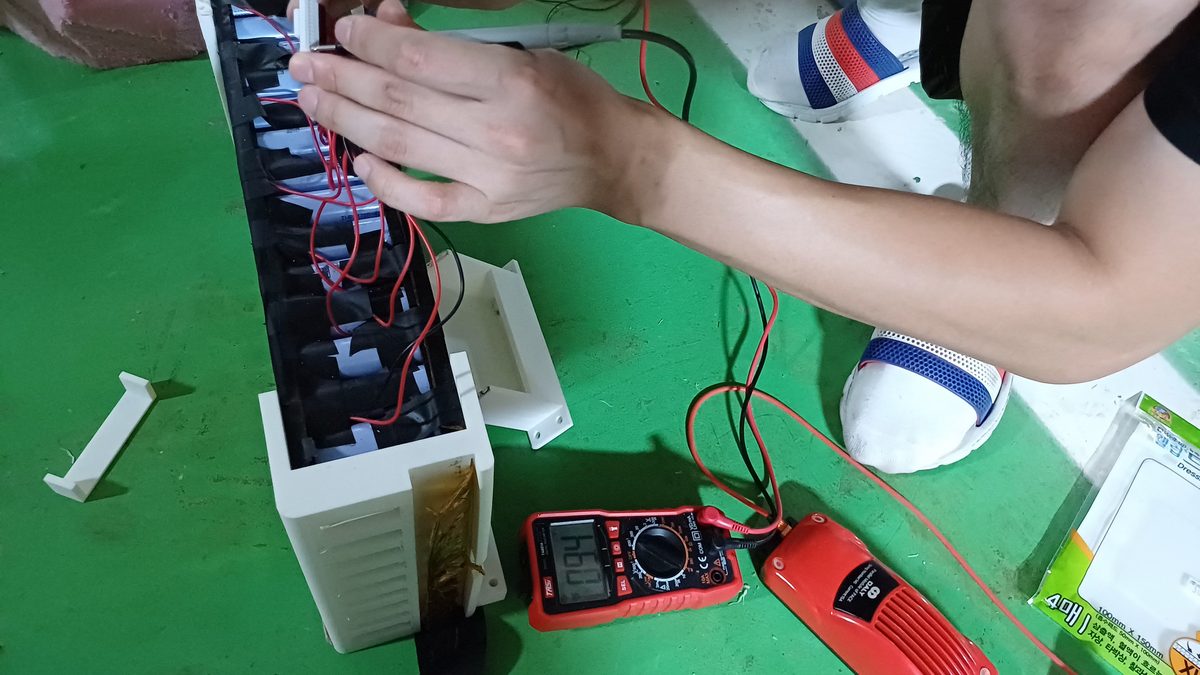
Our race car’s wiring, in our second year, was held together by WAGO connectors and optimism. The car is a Formula Student EV, built by Create Our Car (COC) at Chung-Ang University for the EV class of Formula Student Korea. Almost nothing on the car matched the original design — wires went in, came out, got re-routed, got re-connected, sometimes three times in a week. So when something electrical died, “just look for the problem” was a joke. Everything looked fine. That’s the trap with wiring: your eyes lie. A multimeter doesn’t.
The short version: set the meter to continuity mode, disconnect the battery, and probe the circuit segment by segment — fuse, wire, connector — until the beep stops. The silent segment contains your break. Below is how that plays out on a real car, plus the two other checks that save you from buying parts you didn’t need.
The Day the Car Threw an Error at Startup
At a weekend test session, the motor controller threw an error the moment we powered up. Visually, the harness was perfect: every connector seated, every wire where it should be. So I stopped looking and started probing. Continuity mode — the one that beeps — does one simple thing: touch the two probes to the two ends of a path, and if the path is electrically alive, it beeps. No beep, no path.
End to end across the suspect run: silence. So I split the run into segments and tested each one — wire, connector, wire. The beeper died right across one innocent-looking WAGO connector. It was seated. It looked perfect. Inside, the contact had given up. We swapped it, powered up, and the error was gone. Twenty minutes of probing beat two hours of staring.
The same logic works on any car. If an accessory is dead, check the fuse first — probe both ends of the fuse for continuity instead of squinting at the little metal strip. Then check the wire end to end (with the battery disconnected). If there’s no beep, don’t condemn the whole wire: test segment by segment, connector by connector. Corrosion and loose crimps love to hide inside connectors that look perfectly healthy from the outside.
Trace, Don’t Guess
Later that season, a circuit died mid-test after some hard laps. First theory: the step-down converter was dead. It’s the part everyone suspected, and if we’d been guessing, we would have bought a new one and lost a day. Instead, we probed along the chain, junction by junction, and found the actual break — inside the energy meter, a completely different component.
Mechanics call the guessing approach the “parts cannon”: keep replacing components until the problem goes away. It’s expensive and it teaches you nothing. The meter flips the order. Verify the cheap, accessible suspects first, prove each one innocent or guilty, and follow the evidence. The broken part is where the beep stops, not where your hunch points.
The Ghost in the Readings
One more failure mode, because it cost us a full day: grounds. We once had sensors producing jittery nonsense and a data logger that refused to work, and every reading changed depending on what else was plugged in. The cause was embarrassing — some modules were powered from a separate supply that didn’t share a ground with the main controller. One shared ground wire later, every signal cleaned up instantly.
Cars do the same thing. A bad ground connection produces the weirdest symptoms on the vehicle: flickering lights, gauges that dance, electronics that act possessed only when the engine is running. If a problem feels random and haunted, stop chasing the components and check the ground connections first.
The Ten-Second Mistake That Killed an Entire Board
Every step above says disconnect the battery first. That line isn’t boilerplate. Continuity readings on a live circuit are meaningless anyway, but the real danger is the probe tips: on a dense board the pins sit a couple of millimeters apart, and a probe that slips lands on two of them at once.
I watched a teammate check continuity on our data-logger board with the power still on. A probe slipped and bridged a supply pin to ground. The board died on the spot — microcontroller, sensor inputs, all of it. We reordered the entire parts list, and because the PCB shipped from overseas, ten seconds of impatience cost us weeks and a painful amount of money.
Power off, then probe. If the circuit has to be live, you measure volts — not beeps.
Four Habits That Will Save a Student Team’s Season
On a student-built car, the meter’s real job isn’t diagnosis. It’s stopping four tired people from buying parts they didn’t need with money the team doesn’t have. If you’re the electrical lead on a Formula Student car, these are the four habits I would hand you on your first day.
- Power down before you probe. Every time. Continuity readings on a live circuit are meaningless anyway, and the danger isn’t the reading — it’s the probe tips. I watched a teammate bridge a supply pin to ground on our data-logger board with the power still on. The board died on the spot, the PCB shipped from overseas, and ten seconds of impatience cost us weeks. If a circuit genuinely has to be live, you measure volts — not beeps.
- Probe segment by segment, never end to end and give up. Split the run: wire, connector, wire. The dead segment holds your break. On our car it was a WAGO connector that was properly seated, looked perfect, and had quietly failed inside.
- Suspect the grounds before you suspect the components. Modules fed from a separate supply with no shared ground gave us jittery sensors, a dead logger and readings that changed depending on what else was plugged in. One shared ground wire cleaned all of it up. If a problem feels random and haunted, it’s usually a ground.
- Respect the current jacks. The meter’s current mode is very nearly a short between the probes. If you don’t specifically know you need to measure current, stay on volts and continuity — those two modes solve most of what actually breaks on a student car.
One more, and it’s the one teams skip: write down what you measured, the same day. Our whole diagnostic history lives in a handover report, and it is the only reason next year’s team will know that the connector was the problem and the step-down converter was innocent. A student team loses its memory every single year. The meter readings are how you stop the next lineup from paying for your mistakes twice.
You Don’t Need a Fancy Meter
Ours is a cheap TASI unit from the team room that has outlived several connectors and one energy meter. Any auto-ranging digital multimeter with a continuity beeper will do everything in this article. [AMAZON: auto-ranging digital multimeter]
A race car and a ten-year-old sedan fail the same way: quietly, invisibly, and at the worst possible moment. And sometimes what looks like a wiring fault is really a signal problem — like the day our car insisted its own gas pedal was pressed when nobody was in the seat. Either way, the multimeter is how you stop arguing about what’s broken and start knowing.
As an Amazon Associate I earn from qualifying purchases. This post may contain affiliate links.
Read next → What Actually Happens When You Press the Gas Pedal
Your foot doesn’t pull a cable anymore. It writes a voltage — and ours once wrote one nobody asked for.
Series: This is part of Field Notes — everything that broke on our Formula Student EV car, in the order it broke.